Website Chatbot
This workflow allows you to crawl a website and turn it into a RAG-based agent. This allows you to produce a chatbot that can answer questions from your website.
Creating the workflow
![[object Object]](/assets/images/configure_website_chatbot-bd38dfb1838591ef4f3607e09be05821.png)
- Set the URL of your website where the crawl should start. For example, https://docs.aperturedata.io/. You can include multiple URLs with spaces between them.
- Choose an LLM provider from the list. Currently the choice is between OpenAI, Together, or Groq, but more options may be added.
- Enter an API key for the chosen LLM provider. To acquire an LLM key, go to: OpenAI, Together, Groq. For your security, we recommend that you create a new API key rather than reusing one.
- Set the list of allowed CORS origin domains as a comma-separated list
- Optionally enter an AIMon API key
- Optionally enter an AIMon application name
- Optionally enter an AIMon LLM model name
- Click the blue button at the bottom
See the results
The API
The RAG agent provides an API; see the documentation for more details.
To connect to the API, use the URL for your server with /rag at the end. To authenticate, supply the bearer token in an authorization header:
Authorization: Bearer <token>
This token can be obtained by clicking the connection helper from the workflows section on the Website chatbot workflow.

You can also explore the API using OpenAPI (sometimes referred to as "Swagger") by going to /rag/docs on the server.
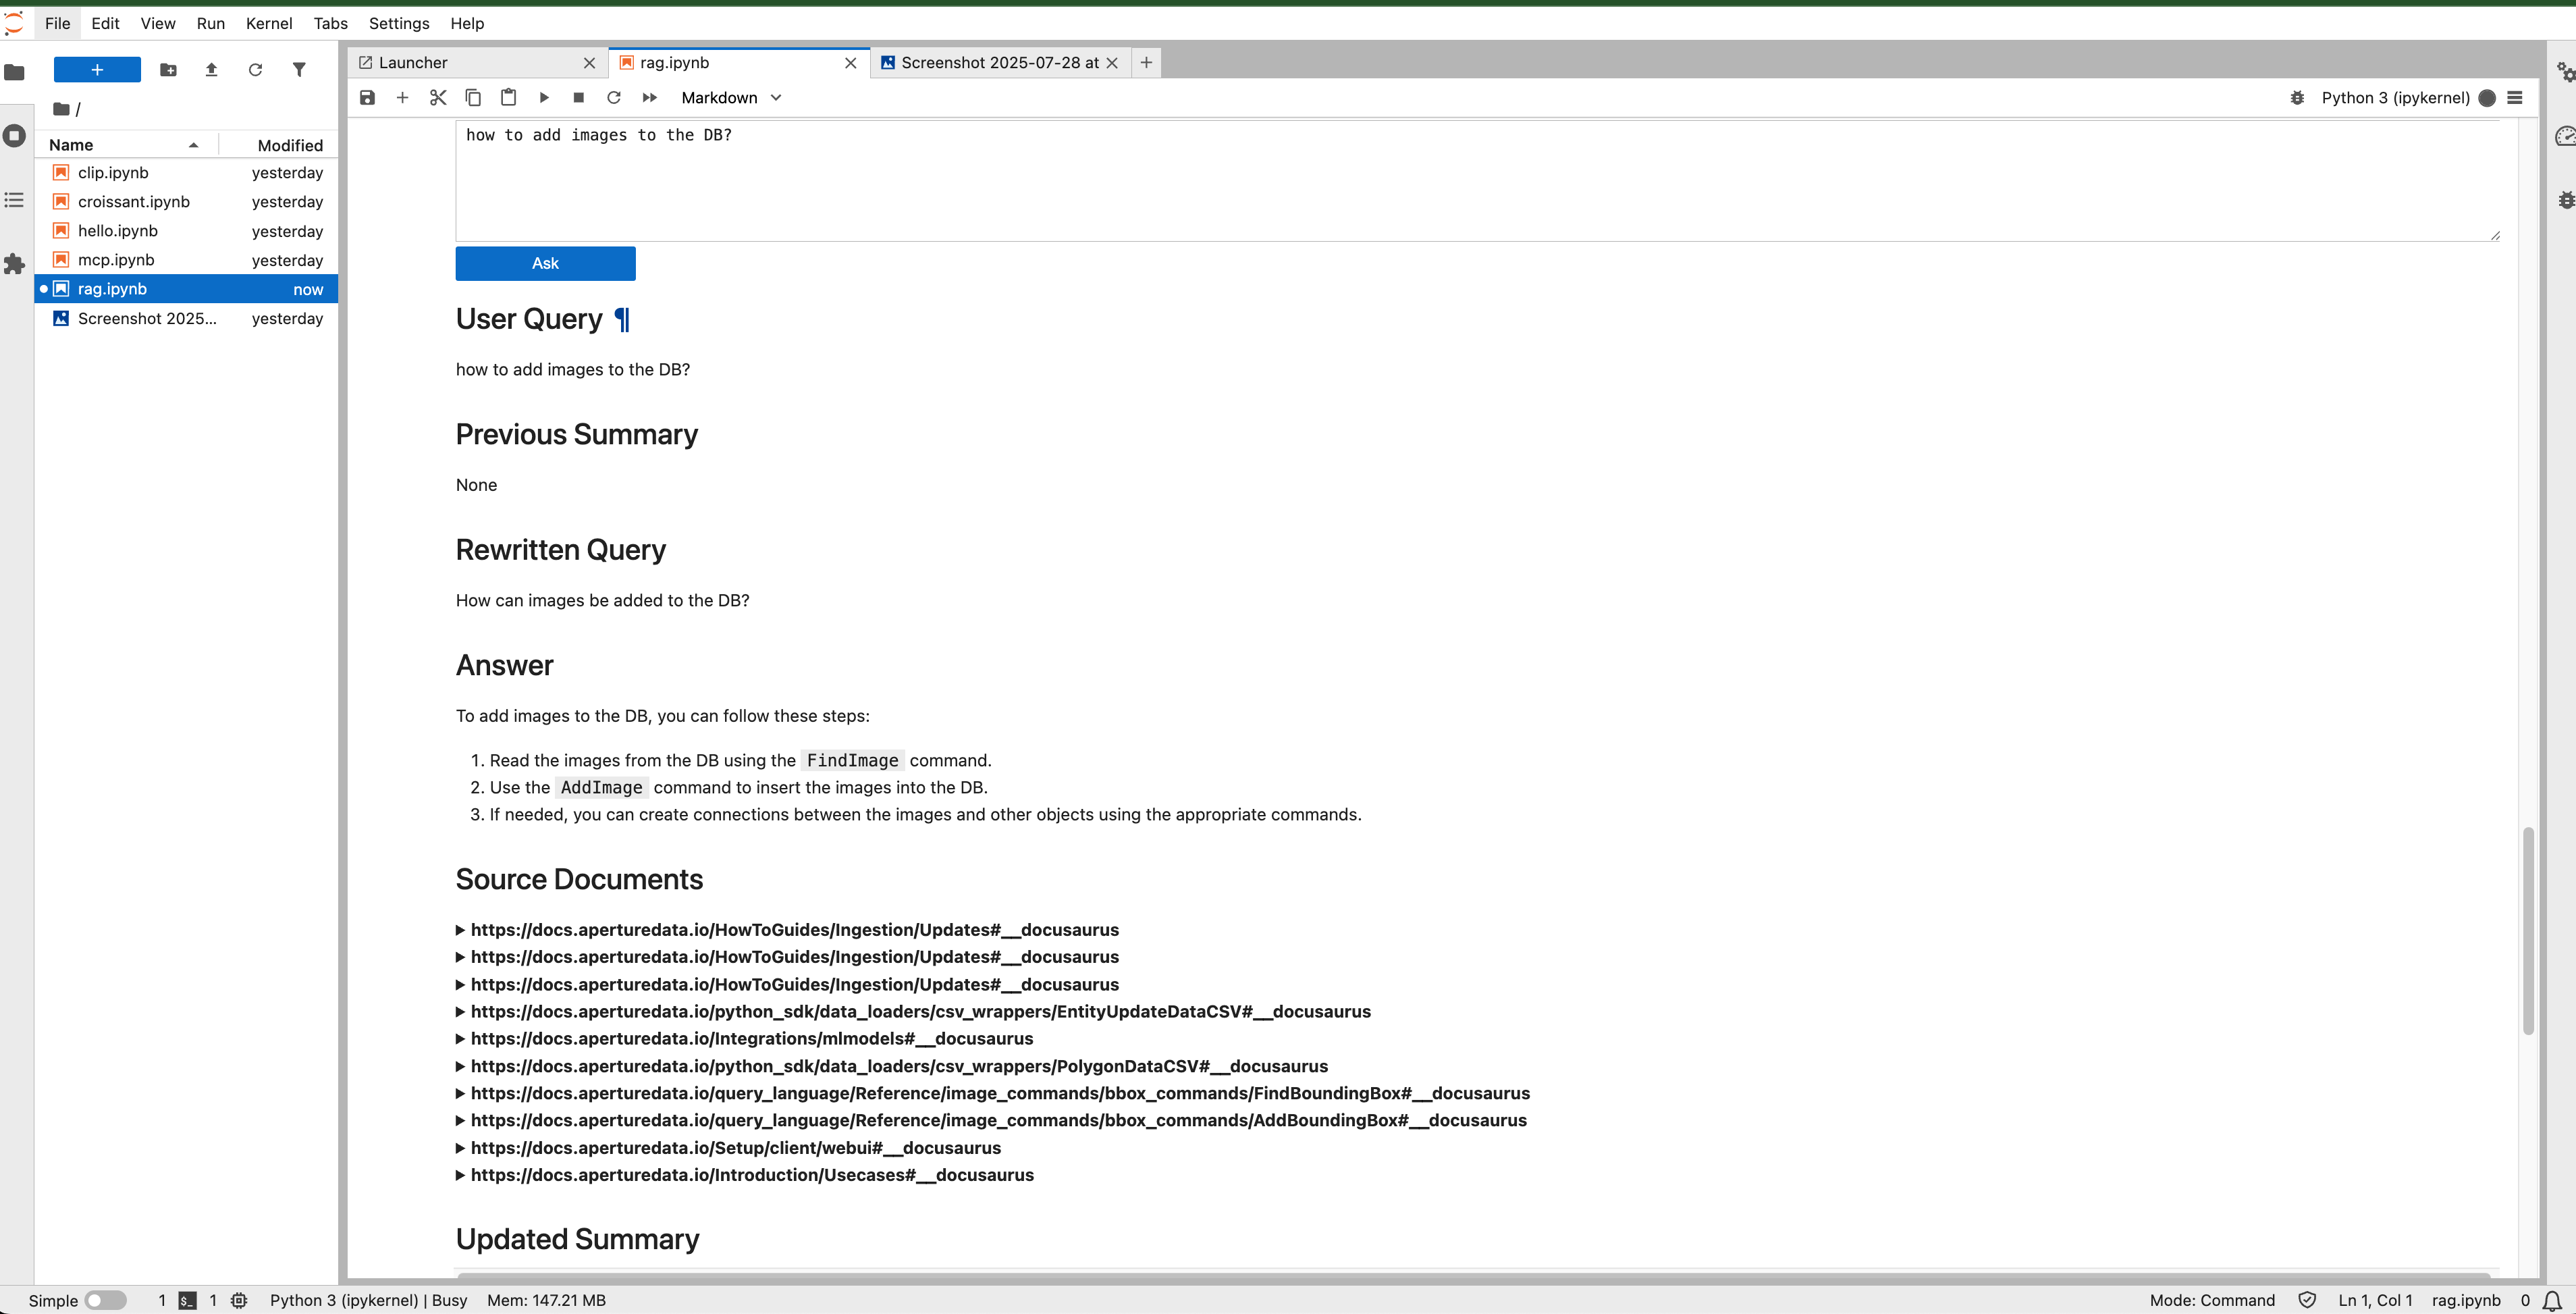
The notebook rag.ipynb on jupyterlab workflow.
In addition to the API, we have a notebook to try query this endpoint, if you've run a jupyterlab workflow.
This notebook contains the code to run a query against the service we stood up by running the website chatbot workflow.
One of the cells in the notebook will prompt for a Key, which is the same token that we copied for authorization.

After supplying that, the service could be asked all sorts of question whose answers are available in the crawled pages in the URL supplied.