Configuration
In order to use a notebook with an ApertureDB instance, it is necessary to supply details about how to connect.
Primarily, this consists of the host name, the user name, and the password.
The recommended way to do this is with an ApertureDB Key, which puts all this
data into an easy to manage string.
Once you have your configuration, you can supply this information directly to Connector.Connector(),
but it is usually better to store password information outside of your source code.
A more convenient approach is to call CommonLibrary.create_connector().
create_connector() looks for configuration information in a number of places.
Some of these try to find an existing configuration.
To create a configuration manually, see adb config create.
create_connector() will look for connection information from its environment in the form of a key: stored in APERUTREDB_KEY.
This string is offered as a convenience method to provide all connection information in one place.
The correct contents of this string will depend on how you have set up your ApertureDB instance.
Getting Your APERTUREDB Key
- Cloud
- Local
If you created your ApertureDB instance using our self-service ApertureDB Cloud portal, then you can obtain a APERTUREDB KEY by clicking on the "Connect" button for your instance.
![[object Object]](/assets/images/instance_details-fc95f146a2bb15b756929a2b5648697d.png)
- Click on the Connect button
![[object Object]](/assets/images/connection_helper-3314991191aa848144c65e615e7e9a6e.png)
- Click on "Generate API Key"
- Copy the key. Make sure that you get the entire string, including any equal signs at the end. Alternatively, copy the suggested Python code.
If you are running your own copy of ApertureDB locally (perhaps using the Community Edition), and you have not changed the password from the default value then you can create a configuration like this:
adb config create localdb --active --host localhost --port 55555 --username admin --password admin
MacOS users may need to change the port number, as 55555 is often already in use, e.g.
adb config create localdb --active --host localhost --port 55554 --username admin --password admin
Finally, retrieve your key using:
adb config get-key
You can copy it into a connector like such:
from aperturedb import Connector
client = Connector.Connector(key=<YOUR_KEY> )
or you can put it into an environment variable:
export APERTUREDB_KEY=$(adb config get-key)
then connect using create_connector, so your source code doesn't contain the key:
from aperturedb import CommonLibrary
client = CommonLibrary.create_connector()
Storing Your APERTUREDB Key
- Environment Variable
- The .env File
- Google Colab Secret
- CLI
One way to make your key available is by putting it into the APERTUREDB_KEY environment variable:
export `APERTUREDB_KEY='YOUR_KEY'
This approach might be useful when running scripts under Docker, as the environment variable can come from one of various possible stores of cloud secrets.
You can make your JSON string available by storing in a .env file under the APERTUREDB_KEY key:
echo 'APERTUREDB_KEY=YOUR_KEY` >> .env
This approach is useful for Jupyter Notebook environments where you can rely on persistence of local file storage and for situations where you have project specific environment variables. The python-dotenv package is a good way to use these:
pip install python-dotenv
Finally, use dotenv to load them:
import os
from dotenv import load_dotenv
load_dotenv()
print(os.getenv("APERTUREDB_KEY"))
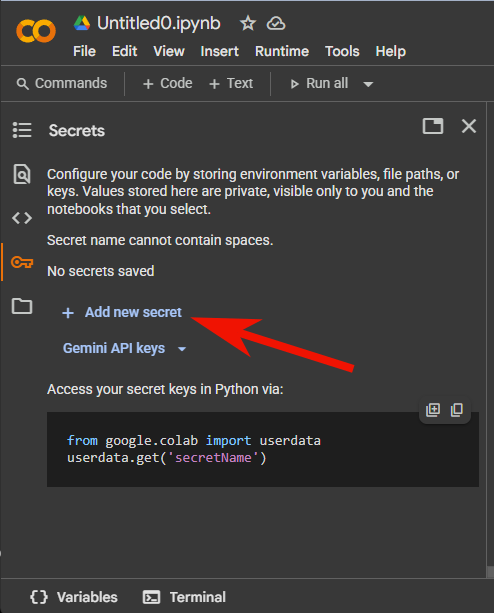
The easiest way to configure one or more Colab notebooks to point to the same ApertureDB server is to put the APERTUREDB KEY into a Colab secret.
This secret will persist over runtime restarts and can be used by all of your notebooks, but it will not be exposed if you share your notebook with anyone.
First, open the menu for Colab secrets.

Next, add a new secret.
Finally, add the secret for ApertureDB key:
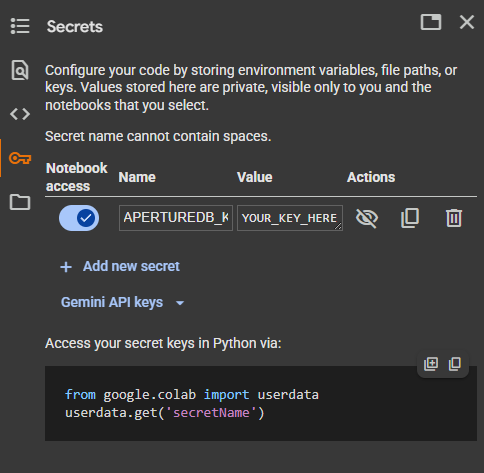
- Ensure that "Notebook access" is enabled
- For the name, enter APERTUREDB_KEY
- Paste the string into the "Value" box.
You may also be asked to allow a notebook permission to access your secrets.
The adb CLI will also accept APERTUREDB KEY strings when creating configurations.
These can come from an environment variable or a .env file, but can also be entered directly in the console.
adb config create imported_key_config --from-key
For example, here is this being done in Google Colab:

For security reasons, the string will not be displayed in the console.